Random posts about coding

Mostly blogging about dart.

Using Dart for Website Publishing on Google Drive

| Comments

After watching a Generating a Google Drive Hosted Website with tools you have lying around in your kitchen by Ali Afshar I got interested in doing the same thing with dart.

Had to ask my self a few questions first?

At the time I started this investigation the discovery_api_dart_client_generator did not have OAuth2 support for installed applications. Knowing that pub does use OAuth2 in a similar fashion, I decided to peek inside of pub to see what it is doing.

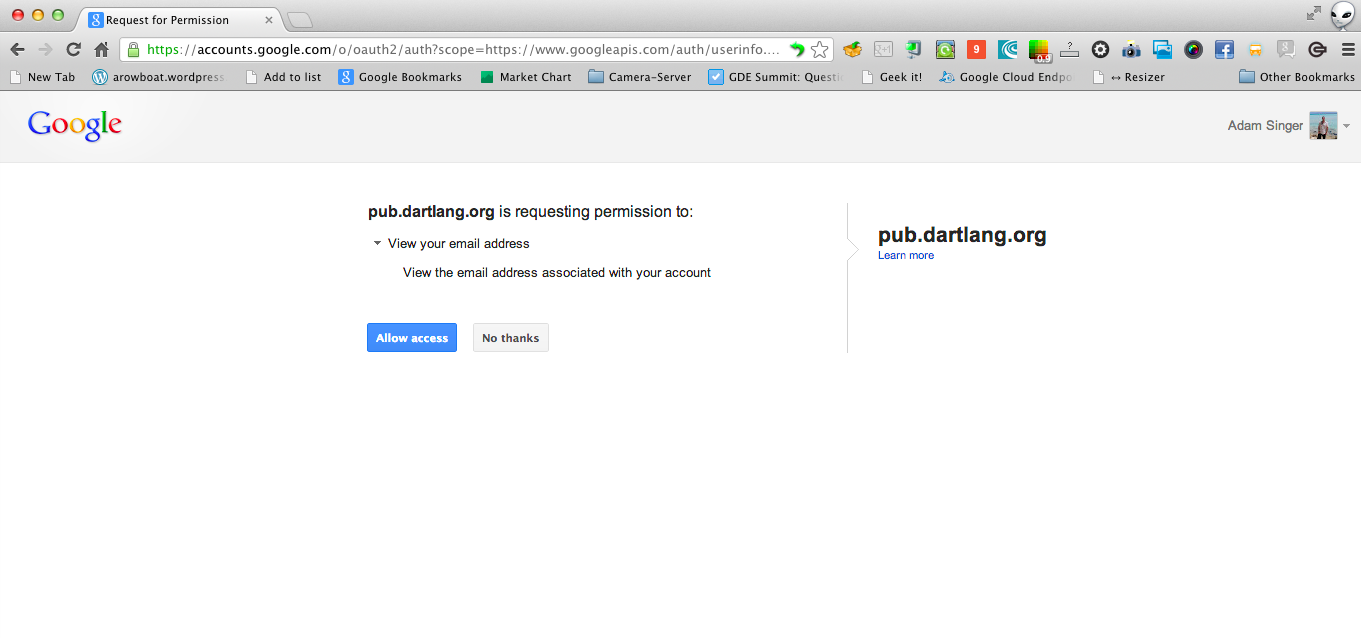
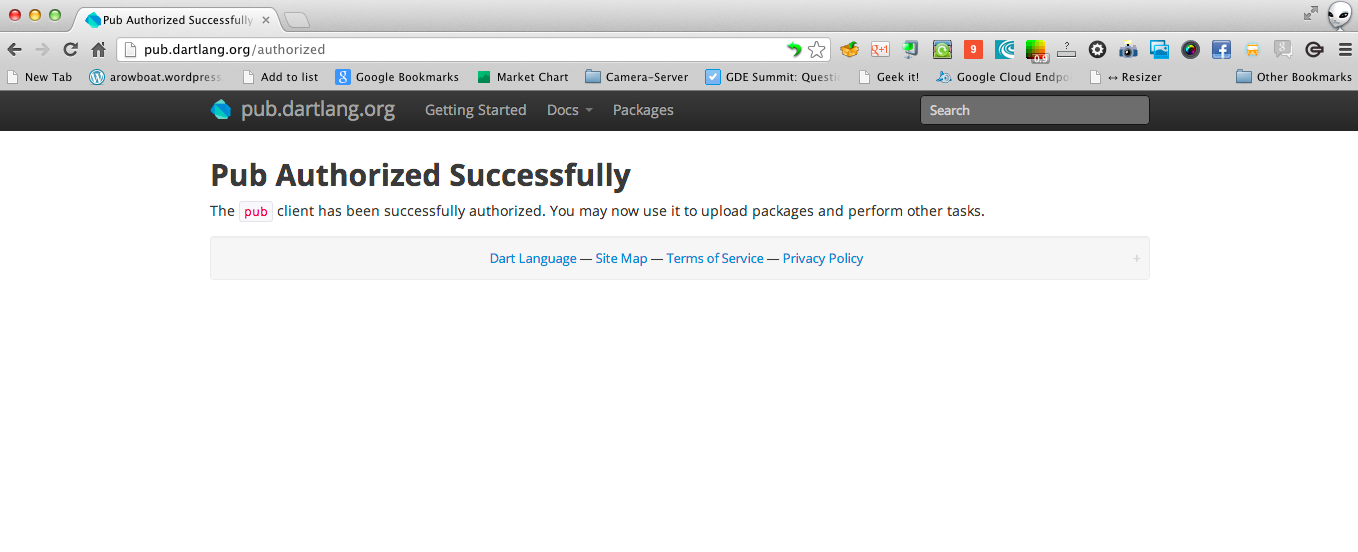
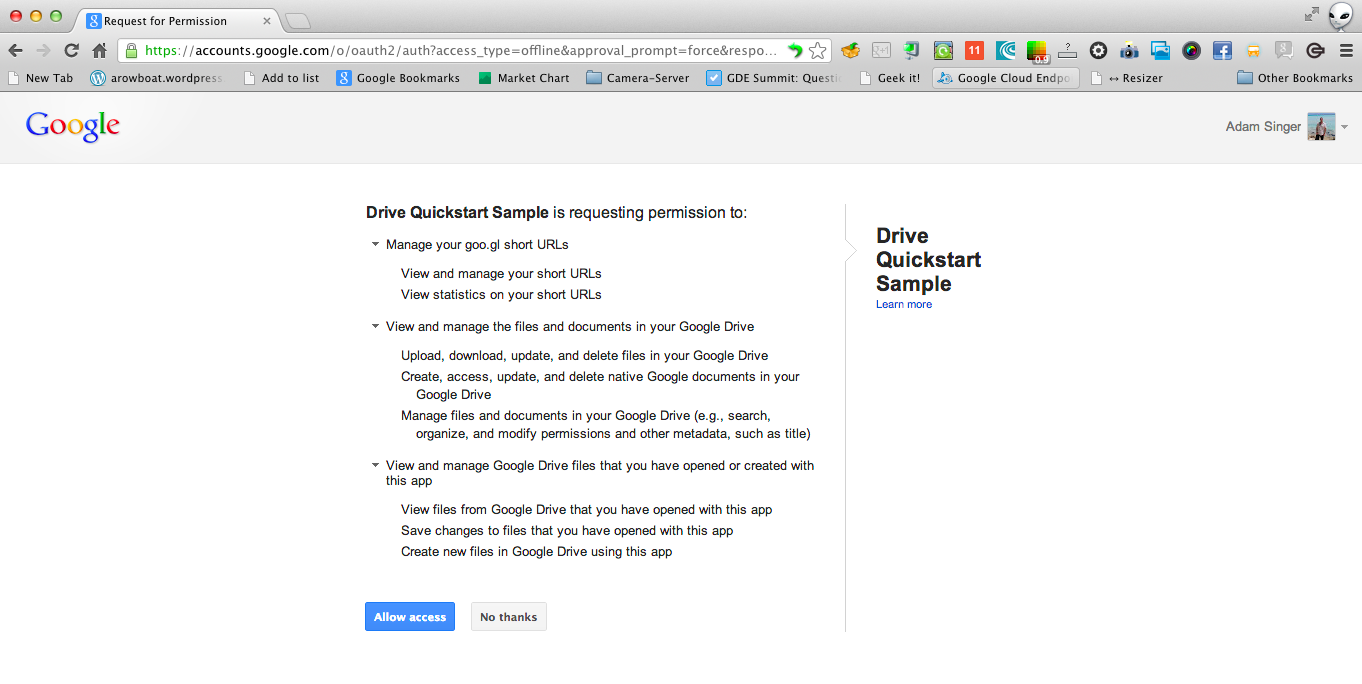
After reviewing the pub source code, it’s interested to see how they handle getting tokens from the Google OAuth2 Authorization Server back to the client application. pub first checks if the client applications has a ~/.pub-cache/credentials.json file stored, if the credentials.json is not found or invalid pub will generate an authorization url. The authorization url is copied and pasted by the user into a web browser and asks the user if they will allow access to some scopes. When the user accepts access the redirect url with token the Google OAuth2 Authorization Server redirects to a listening http server on localhost. This server was started by the pub application, now pub has the token and stores it for later use.

1
2
3
4
5
6
7
8
9
10
11
12
13
14
15
16
17
18
19
20
21
22
23
24
25
26
27
28
29
30
31
32
33
34
35
36
37
12:22:46-adam@Adams-MacBook-Air:~/dart/stats.dart
$ pub publish
Publishing "stats" 0.0.4:
|-- .gitignore
|-- AUTHORS
|-- LICENSE
|-- README.md
|-- asset
|   |-- stats_dart_fps.png
|   '-- stats_dart_ms.png
|-- example
|   |-- basic
|   |   |-- statsdart.dart
|   |   '-- statsdart.html
|   '-- theming
|       |-- theming.dart
|       '-- theming.html
|-- lib
|   |-- src
|   |   '-- stats.dart
|   '-- stats.dart
|-- pubspec.yaml
'-- test
    |-- run.sh
    |-- tests_browser.dart
    '-- tests_browser.html

Looks great! Are you ready to upload your package (y/n)? y
Pub needs your authorization to upload packages on your behalf.
In a web browser, go to https://accounts.google.com/o/oauth2/auth?access_type=offline&approval_prompt=force&response_type=code&client_id=818368855108-8grd2eg9tj9f38os6f1urbcvsq399u8n.apps.googleusercontent.com&redirect_uri=http%3A%2F%2Flocalhost%3A62462&scope=https%3A%2F%2Fwww.googleapis.com%2Fauth%2Fuserinfo.email
Then click "Allow access".

Waiting for your authorization...
Authorization received, processing...
Successfully authorized.

Package "stats" already has version "0.0.4".

allow_access

success.png

After some initial slicing and dicing I was able to take what was needed from pub and merge it into dart-google-oauth2-library that discovery_api_dart_client_generator depends on for OAuth2 support. pub was structured such that all files are dart libraries, so ripping out parts was easy, I found the most issues with http package. The client requests ContentType could only be set as application/x-www-form-urlencoded when making requests, this did not seem to play nicely with Google APIs. Took many hours of debugging to figure out why POST method would fail but GET method would not. Stumbled on some Google mailing lists that mentioned some services do work with ContentType application/x-www-form-urlencoded and some only with application/json. So I created a separate client that does the POST, PATCH, PUT, DELETE methods required for the Google Client APIs.

Big thanks to Gerwin Sturm for working on this merge with me, in a very short amount of time we’ve been able to push the dart-google-oauth2-library and discovery_api_dart_client_generator into almost complete solutions for dart and Google Client API services.

The markdown.dart processor was for the most part a total freebie, Bob Nystrom had already created a markdown processor which eventually got rolled into Dartdoc. All that was needed here is picking out the code from the dart repo, updating libraries and import, minor code clean up and hosting it on github.

One of my all time favorite Google APIs is the url-shortener API. Even without OAuth2 you can use this service, now that we have patched up dart-google-oauth2-library and discovery_api_dart_client_generator shortening the long webViewLink will be easy. A site note, goo.gl links work great as for landing slides when giving a presentation, easy and short enough for audience to type into mobile phone, tablet or laptop to pull down your slides and follow along.

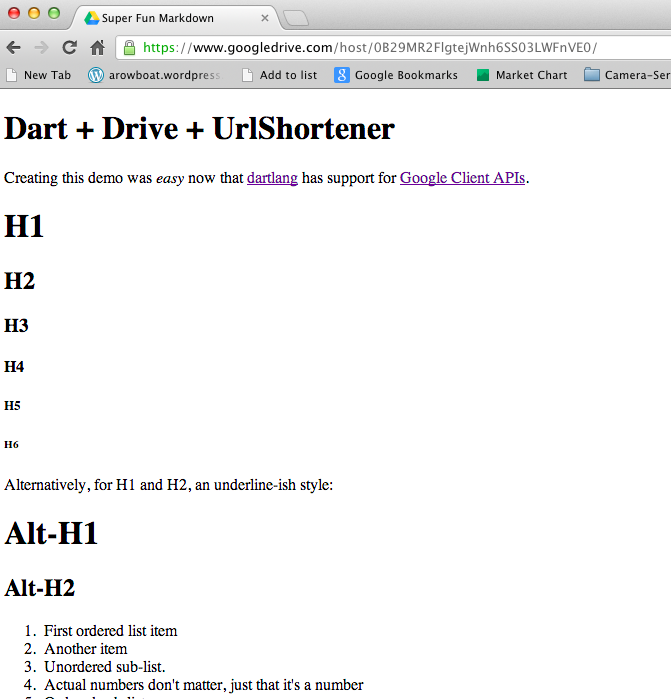
Now we have all the parts needed to create a simple application that reads in some markdown, processes it to html, creates a website folder on drive, uploads the final html, then generates a shortened url.

We are still working on the best way to publish the Dart Google Client APIs, so please don’t depend on the links below for too long, they will be out dated soon. This was just for testing.

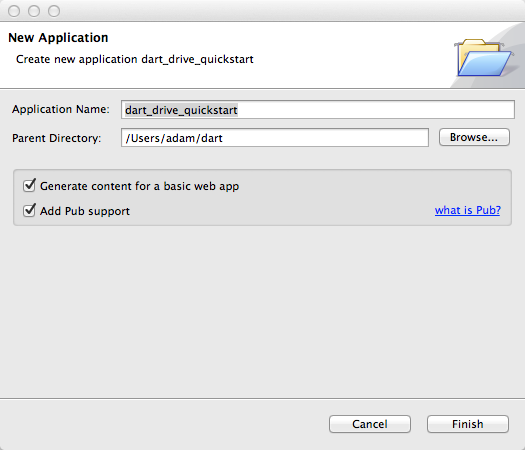
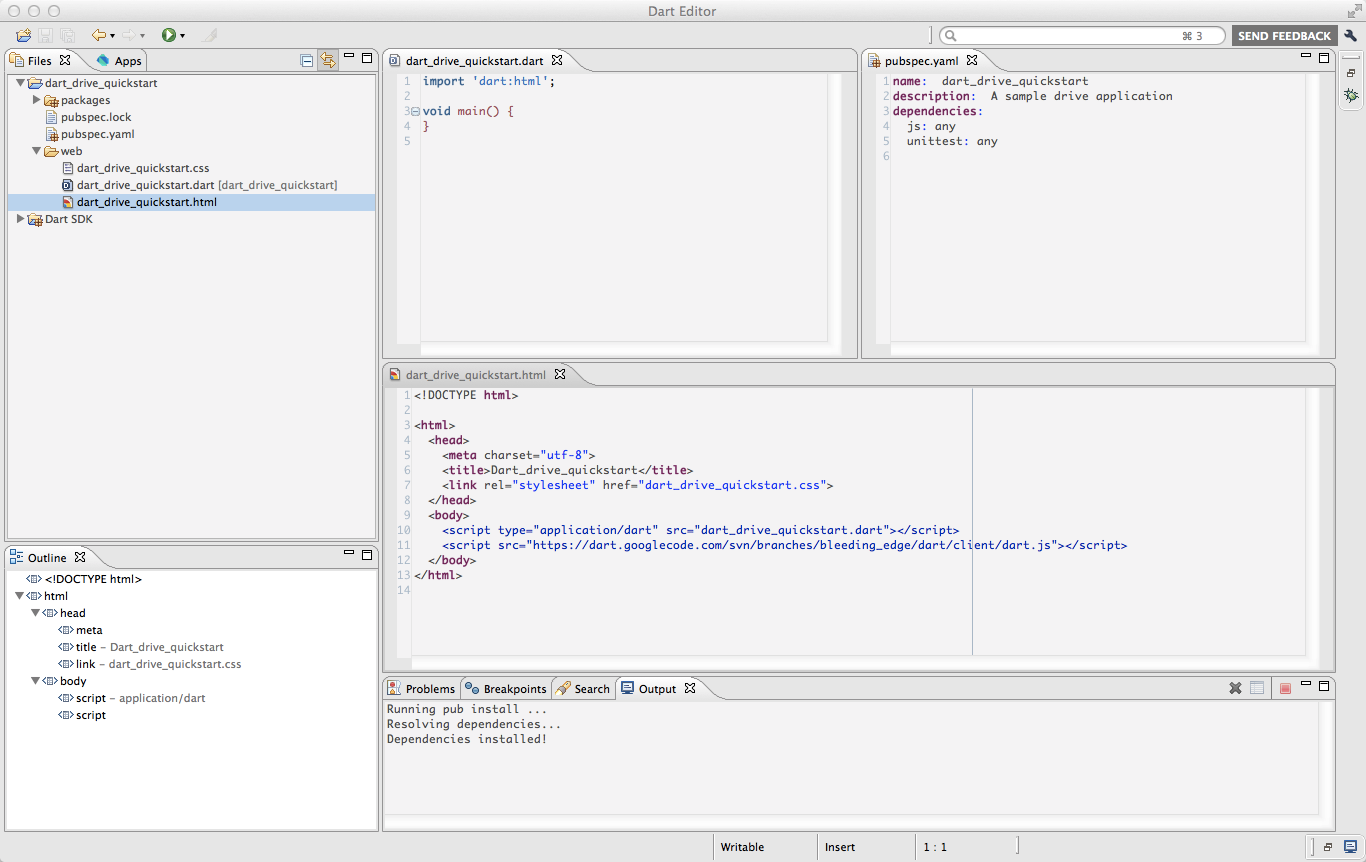
Starting off with our pubspec.yaml file we add the dependencies needed for the application.

1
2
3
4
5
6
7
8
9
name:  drive_publish_markdown
description:  Publishing markdown content to a public drive site
dependencies:
  urlshortener_v1_api:
    git: https://github.com/financeCoding/urlshortener_v1_api_client.git
  drive_v2_api:
    git: https://github.com/financeCoding/drive_v2_api_client.git
  markdown:
    git: https://github.com/financeCoding/markdown.dart.git

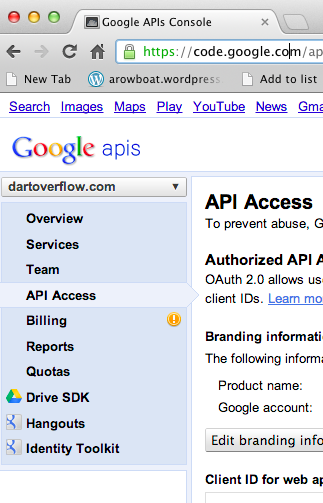
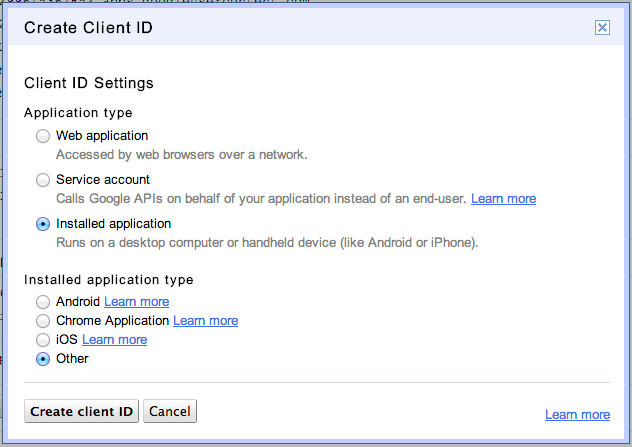
Getting a identifier and secret is simple, just goto your Google APIs Console and pull out Client ID and Client secret for a Client ID for installed applications that was previously created. If you don’t have one already they are easy to create.

  • Goto API access in a project.
    api_access

  • Click Create another client ID. create_another_client_id

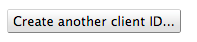
  • Choose Installed application and Installed type Other. Your Done! create_client_id

Apply identifier and secret to your code.

1
2
3
4
5
6
7
8
9
10
11
12
13
14
15
import "dart:io";
import "dart:async";
import 'dart:crypto';
import "dart:json" as JSON;
import "package:google_oauth2_client/google_oauth2_console.dart";
import "package:drive_v2_api/drive_v2_api_console.dart" as drivelib;
import "package:urlshortener_v1_api/urlshortener_v1_api_console.dart" as urllib;
import "package:markdown/lib.dart" as markdown;

String identifier = "<IDENTIFIER>";
String secret = "<SECRET>";
List scopes = [drivelib.Drive.DRIVE_FILE_SCOPE, drivelib.Drive.DRIVE_SCOPE, urllib.Urlshortener.URLSHORTENER_SCOPE];
drivelib.Drive drive;
urllib.Urlshortener urlshort;
OAuth2Console auth;

Now with identifier and secret the setup for a dart application to use Drive and Urlshortener is easy, create a new OAuth2Console and pass them along to the constructor of Drive and Urlshortener. Note that the flag makeAuthRequests has been set on both objects, that allows us to make authroized calls on behalf of the user. You could create the Google Client API objects without a OAuth2 token and leave the makeAuthRequests as false, the objects would then only be allowed to access non-authenticated resources on the Google servers.

1
2
3
4
5
6
7
8
9
10
11
12
13
14
15
16
17
18
19
20
21
22
23
void main() {
  /**
   * Create new or load existing oauth2 token.
   */
  auth = new OAuth2Console(identifier: identifier, secret: secret, scopes: scopes);

  /**
   * Create a new [drivelib.Drive] object with authenticated requests.
   */
  drive = new drivelib.Drive(auth);
  drive.makeAuthRequests = true;

  /**
   * Create a new [urllib.Urlshortener] object with authenticated requests.
   */
  urlshort = new urllib.Urlshortener(auth);
  urlshort.makeAuthRequests = true;

  /**
   * Create a new 'public_folder' and insert markdown as html
   */
  createPublicFolder("public_folder").then(processMarkdown);
}

I have to admit, updating permissions took me awhile to figure out. I first tried to update by calling drive.files.update with a modified drivelib.File. That was not the proper way to change permissions on drive. The correct way is to call the drive.permissions.* methods, lesson learned after some Googling and searching on stackoverflow drive-sdk. Setting the Permissions and mimeType are the most important parts to note here, thats what change the folder into a public website hosted on drive viewable to anyone.

1
2
3
4
5
6
7
8
9
10
11
12
13
14
15
16
17
18
19
20
21
22
23
24
25
26
27
28
29
30
31
32
33
void insertPermissions(drivelib.File file, Completer completer) {
  /**
   * Create new [drivelib.Permission] for insertion to the
   * drive permissions list. This will mark the folder publicly
   * readable by anyone.
   */
  var permissions = new drivelib.Permission.fromJson({
    "value": "",
    "type": "anyone",
    "role": "reader"
  });

  drive.permissions.insert(permissions, file.id).then((drivelib.Permission permission) => completer.complete(file));
}

Future<drivelib.File> createPublicFolder(String folderName) {
  var completer = new Completer();

  /**
   * Create the [drivelib.File] with a web folder app mime type.
   */
  drivelib.File file = new drivelib.File.fromJson({
    'title': folderName,
    'mimeType': "application/vnd.google-apps.folder"
  });

  /**
   * Insert the [drivelib.File] to google drive.
   */
  drive.files.insert(file).then((drivelib.File newfile) => insertPermissions(newfile, completer));

  return completer.future;
}

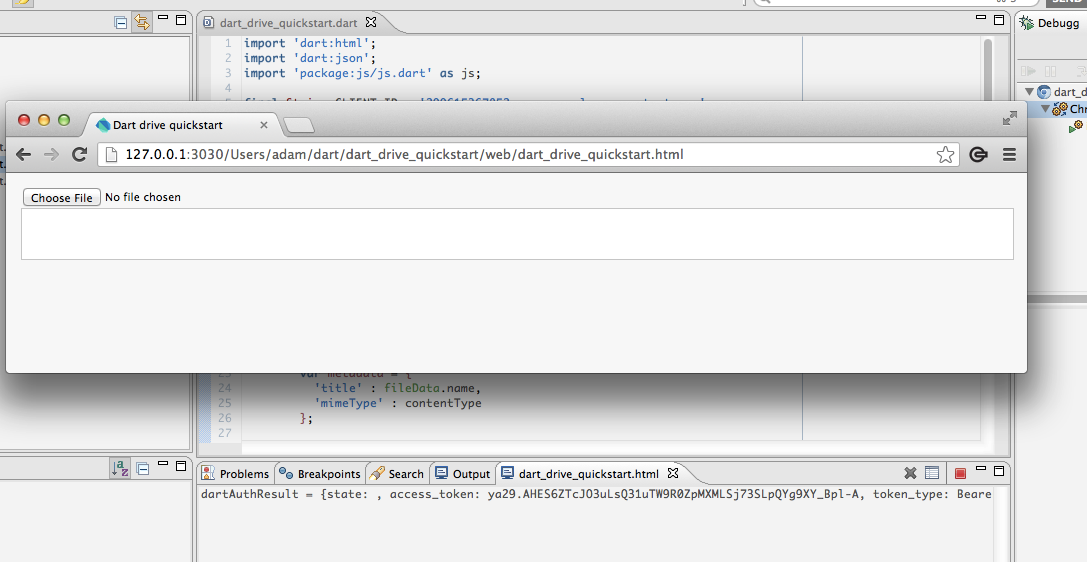
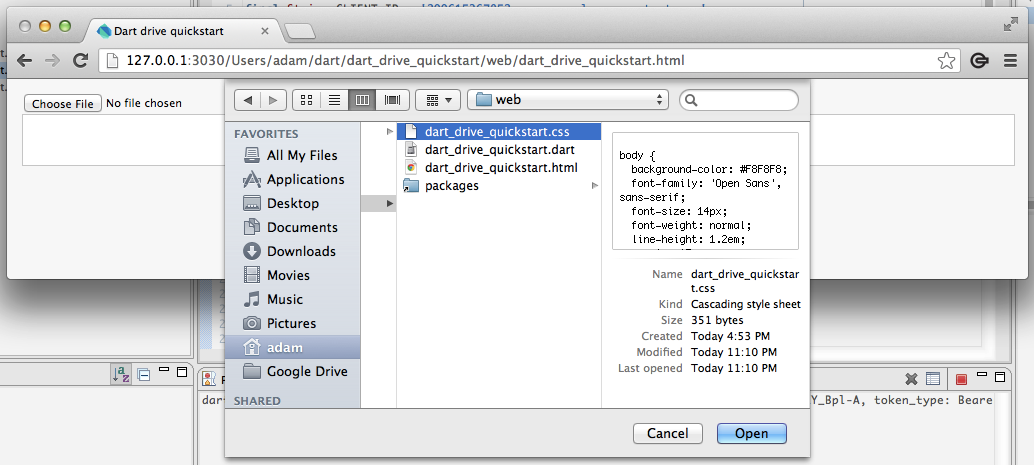
Now we get to the meat and potatoes of our application. At this point we have a public web folder that can host our content. We do the follow steps

  • Read in the markdown and html template file
  • Replace a tag in the template with the markdown
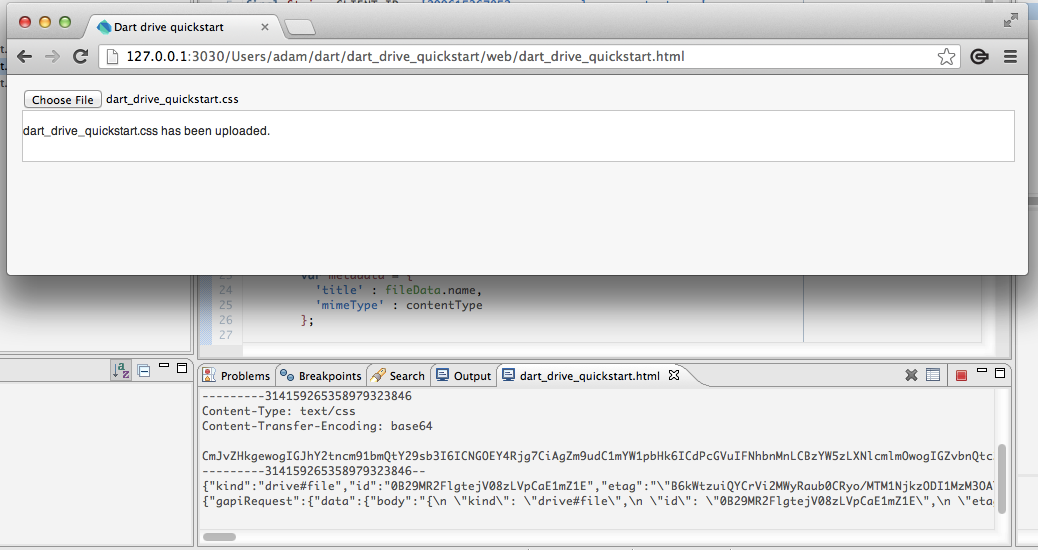
  • Insert the file into drive
  • Add a parent reference to the file
  • Get the url to the folder
  • Shorten the url
1
2
3
4
5
6
7
8
9
10
11
12
13
14
15
16
17
18
19
20
21
22
23
24
25
26
27
28
29
30
31
32
33
34
35
36
37
38
39
40
41
42
43
44
45
46
47
48
49
50
51
52
53
54
55
processMarkdown(drivelib.File folder) {
  /**
   * Read in both markdown and html template
   */
  var markdownFile = new File('markdown.md');
  var templateFile = new File('template.html');
  var markdownStr = markdownFile.readAsStringSync();
  var templateStr = templateFile.readAsStringSync();

  /**
   * Convert markdown to html.
   */
  var page = markdown.markdownToHtml(markdownStr);

  /**
   * Replace $page with converted markdown.
   */
  templateStr = templateStr.replaceFirst('\$page', page);

  /**
   * Create a new [drivelib.File] to hold the html content.
   */
  drivelib.File file = new drivelib.File.fromJson({
    'title': 'index.html',
    'mimeType': "text/html"
  });

  /**
   * Create a new [drivelib.ParentReference] to link the html file to.
   */
  drivelib.ParentReference newParent = new drivelib.ParentReference.fromJson({'id': folder.id});

  /**
   * Encode the content to Base64 for inserting into drive.
   */
  var content = CryptoUtils.bytesToBase64(templateStr.charCodes);

  /**
   * 1) Insert the new file with title index.html and type text/html
   * 2) Insert the new parent of the file (i.e. place the file in the folder)
   * 3) Get the folders web view link
   * 4) Shorten the web view link with UrlShortener
   */
  drive.files.insert(file, content: content).then((drivelib.File insertedFile) {
    drive.parents.insert(newParent, insertedFile.id).then((drivelib.ParentReference parentReference) {
      drive.files.get(folder.id).then((folder) {
        print("Web View Link: ${folder.webViewLink}");
        var url = new urllib.Url.fromJson({'longUrl': folder.webViewLink});
        urlshort.url.insert(url).then((url) {
          print("Short Url ${url.id}");
        });
      });
    });
  });
}

The code for this sample can be found on github drive_publish_markdown. Executing the sample follows the flow explained above

  • Ask user to generate token
  • Get token from redirect
  • Store token
  • Make drive and url-shortener requests.
1
2
3
4
5
6
7
8
9
10
11
12
13
14
13:32:40-adam@Adams-MacBook-Air:~/dart/drive_publish_markdown/bin
$ dart drive_publish_markdown.dart
Client needs your authorization for scopes [https://www.googleapis.com/auth/drive.file, https://www.googleapis.com/auth/drive, https://www.googleapis.com/auth/urlshortener]
In a web browser, go to https://accounts.google.com/o/oauth2/auth?access_type=offline&approval_prompt=force&response_type=code&client_id=299615367852-n0kfup30mfj5emlclfgud9g76itapvk9.apps.googleusercontent.com&redirect_uri=http%3A%2F%2Flocalhost%3A62900&scope=https%3A%2F%2Fwww.googleapis.com%2Fauth%2Fdrive.file+https%3A%2F%2Fwww.googleapis.com%2Fauth%2Fdrive+https%3A%2F%2Fwww.googleapis.com%2Fauth%2Furlshortener
Then click "Allow access".

Waiting for your authorization...
Authorization received, processing...
Calling curl with --insecure, ca-certificates.crt not found.
Successfully authorized.

Calling curl with --insecure, ca-certificates.crt not found.
Web View Link: https://www.googledrive.com/host/0B29MR2FlgtejWnh6SS03LWFnVE0/
Short Url http://goo.gl/3fGi3

allow_access_drive_publish_markdown

generated_markdown_published_on_drive

Thats all, have fun with this really simple and easy to get started sample.

Darting a Full Stack

| Comments

tl;dr A common question that comes up is connecting all parts of dart together. Here I will show a simple example of connecting up web-ui and objectory.

web-ui is a WebComponents framework provided by the dart-lang team. objectory is a data persistence layer for MongoDB that provides typed, checked environment for models, saving and queries. With these two components and a very simple web server we could have a nice full stack solution in dart.

Initially Vadim Tsushko did some work to wire up TodoMVC from the web-ui examples with indexdb. Using the same code and updated version of TodoMVC I was able to connect it to mongodb using the web socket connection provided with objectory.

It would of been nice if this solution could possibly be deployed onto heroku, ended up not possible since heroku does not support native web socket connections with their internal routing. socket.io does work on heroku but uses long polling instead of true web sockets.

Another note, since dart is in a transitional phase right now for implementing streams, some of this code depends packages that have not yet been pushed to pub.dartlang.org

So lets get started with the basics, getting up and running with objectory. Install mongo if its not already and fire up a mongo database.

mongo install
1
2
3
4
brew install mongo
cd /tmp/
mkdir db
mongod -dbpath .

The version of dart being used is the latest trunk build 17072

1
2
$ cat ~/dart/dart-sdk/version
0.3.0.1_r17072

clone and test objectory as a sanity check

objectory
1
2
3
4
5
6
7
$ cd /Users/adam/dart/
$ git clone https://github.com/vadimtsushko/objectory.git
$ cd objectory
$ pub install
$ cd bin
$ dart objectory_server.dart
listing on http://127.0.0.1:8080

Open up another terminal and run the example/blog_console.dart application.

1
2
3
4
5
6
7
8
9
10
11
12
13
14
15
16
17
18
19
20
21
22
23
$ cd ~/dart/objectory/example
$ dart blog_console.dart
===================================================================================
>> Adding Authors
===================================================================================
>> Authors ordered by age ascending
[Jorge Luis Borges]:[jorge@borges.com]:[123]
[William Shakespeare]:[william@shakespeare.com]:[587]
===================================================================================
>> Adding Users
===================================================================================
>> >> Users ordered by login ascending
[jdoe]:[John Doe]:[john@doe.com]
[lsmith]:[Lucy Smith]:[lucy@smith.com]
===================================================================================
>> Adding articles
===================================================================================
>> Printing articles
Jorge Luis Borges:Caminando por Buenos Aires:Las callecitas de Buenos Aires tienen ese no se que...
     2013-01-07 16:21:26.437:Lucy Smith: Well, you may do better...
     2013-01-15 16:01:26.445:John Doe: I love this article!
William Shakespeare:I must have seen thy face before:Thine eyes call me in a new way
     2013-01-16 11:28:06.453:John Doe: great article!

Now if we want to see the blog stored in mongo we need to remove the line in blog_console.dart that drops the database collection and rerun.

blog_console.dart.diff
1
2
3
4
5
6
7
8
9
10
11
12
13
diff --git a/example/blog_console.dart b/example/blog_console.dart
index 6775427..fd1d918 100644
--- a/example/blog_console.dart
+++ b/example/blog_console.dart
@@ -84,7 +84,7 @@ main(){
     print(">> Printing articles");
     return Future.wait(articles.mappedBy((article) => printArticle(article)));
   }).then((_) {
-    return objectory.dropCollections();
+    return objectory;
   }).then((_) {
    objectory.close();
   });

Opening up mongo and peeking in side we see the following entries have been stored.

1
2
3
4
5
6
7
8
9
10
11
12
13
14
15
16
17
$ mongo
MongoDB shell version: 2.2.2
connecting to: test
> show dbs
local (empty)
objectory_blog    0.203125GB
> use objectory_blog
switched to db objectory_blog
> show collections
Article
Author
User
system.indexes
> db.Article.find()
{ "_id" : ObjectId("50f751f09925f54002000008"), "title" : "Caminando por Buenos Aires", "body" : "Las callecitas de Buenos Aires tienen ese no se que...", "author" : DBPointer("Author", ObjectId("50f751f09925f54002000001")), "comments" : [  {"date" : ISODate("2013-01-08T00:24:21.201Z"),     "body" : "Well, you may do better...",  "user" : DBPointer("User", ObjectId("50f751f09925f54002000005")) },   {    "date" : ISODate("2013-01-16T00:04:21.206Z"),     "body" : "I love this article!",    "user" : DBPointer("User", ObjectId("50f751f09925f54002000004")) } ] }
{ "_id" : ObjectId("50f751f09925f54002000009"), "title" : "I must have seen thy face before", "body" : "Thine eyes call me in a new way", "author" : DBPointer("Author", ObjectId("50f751f09925f54002000000")), "comments" : [   {    "date" : ISODate("2013-01-16T19:31:01.212Z"),     "body" : "great article!",  "user" : DBPointer("User", ObjectId("50f751f09925f54002000004")) } ] }
>

Now that we have done a sanity check we can start to move forward with TodoMVC side of things.

I’ve provided a web-ui branch, the branch fixes up some of the pubspec inconsistencies between the projects on pub.dartlang.org. In the future this would not be needed.

1
2
3
$ git clone -b objectory_example git://github.com/financeCoding/web-ui.git
$ cd ~/dart/web-ui
$ pub install

objectory provides a very nice browser based web socket connector to the objectory server named ObjectoryWebsocketBrowserImpl. This allows us to register our models. The TodoMVC application model has a Todo object we’d like to persist.

model.dart
1
2
3
4
5
6
7
8
9
10
11
12
13
14
15
16
class Todo extends PersistentObject {

  String get task => getProperty('task');
  set task(String value) => setProperty('task',value);

  bool get done => getProperty('done');
  set done(bool value) => setProperty('done',value);

  Todo(String newTask) {
    done = false;
    task = newTask;
    saveOnUpdate = true;
  }

  String toString() => "$task ${done ? '(done)' : '(not done)'}";
}

By extending PersistentObject and adding the getProperty and setProperty methods to our getters and setters we have easily transformed this object to be persisted by objectory.

To bind this up to objectory we new up a ObjectoryWebsocketBrowserImpl, when the application model is created, register the Todo class.

model.dart
1
2
3
4
5
6
7
8
9
10
11
12
13
14
15
16
17
import 'package:objectory/objectory_browser.dart';
ObjectoryQueryBuilder get $Todo => new ObjectoryQueryBuilder('Todo');
const DefaultUri = '127.0.0.1:8080';
AppModel _app;
AppModel get app {
  if (_app == null) {
    _app = new AppModel();
     objectory = new ObjectoryWebsocketBrowserImpl(DefaultUri, () =>
         objectory.registerClass('Todo',()=>new Todo('')), false); // set to true to drop models
     objectory.initDomainModel().then((_) {
       objectory.find($Todo).then((todos) {
         app.resetTodos(todos);
       });
     });
  }
  return _app;
}

The final step is when a todo is added we also save it in objectory by calling objectory.save().

main.dart
1
2
3
4
5
6
7
8
9
10
11
import 'package:objectory/objectory.dart';
[...]
void addTodo(Event e) {
  e.preventDefault(); // don't submit the form
  var input = query('#new-todo');
  if (input.value == '') return;
  var todo = new Todo(input.value);
  app.todos.add(todo);
  objectory.save(todo);
  input.value = '';
}

In the custom branch provided, I renamed the standard build.dart to x_build.dart in hope to save my poor laptop from needlessly building. On a faster system this is not needed. Now we can launch the x_build.dart to generate the output build from the web components sample.

1
2
$ dart x_build.dart
Total time spent on example/todomvc/main.html                -- 276 ms

From the dart editor we can now launch the output folder main.html.

launch-dartium

todo_entered

This is a nice start, we can launch a web-ui application from dartium and connect up mongo. The issues now… how do we get the kind of application live and not launched on localhost?

  • Create a http server
  • Add objectory to it
  • Compile todomvc application to javascript

Why are the steps above needed? First the objectory ObjectoryServerImpl used in objectory_server.dart hides HttpServer which doesn’t really work for us if we need to serve up static content. Good thing that the class is relativity simple to modify. Compiling todomvc to javascript is an additional step also, but helps us greatly the server logic, only a few files will need to be matched. When a complete and updated web server framework comes to town for dart this would also not be needed.

Modifying the DefaultUri for ObjectoryWebsocketBrowserImpl so it looks at the host’s location will help for deploying it on a server. The web socket location can then be resolved dynamically.

model.dart
1
2
3
import 'dart:html';
[...]
var DefaultUri = window.location.host;

Compile the web component and update the base.css and dart.js.

main.html
1
2
3
4
[...]
  <link rel="stylesheet" href="base.css">
[...]
  <script type="text/javascript" src="dart.js"></script>

Then compile down to javascript after modifying the html.

1
2
$ cd ~/dart/web-ui/example/todomvc/out
$ dart2js -omain.html_bootstrap.dart.js main.html_bootstrap.dart
1
2
cd ~/dart/web-ui/example/todomvc/out
$ cp ../base.css main.html main.html_bootstrap.dart.js dart.js ~/dart/dart-full-stack-example/

*The dart_full_stack_example can be found on github, it contains the server code *

1
2
$ cd ~/dart/
$ git clone https://github.com/financeCoding/dart-full-stack-example.git

Moving onto dart_full_stack_example, this project will contain the compiled js and html code along with a server. The server will handle delivering the static content also provide the interfaces for the web socket connection.

server.dart
1
2
3
final IP = '0.0.0.0';
final PORT = '8080';
final URI = 'mongodb://127.0.0.1/objectory_server_test';

The server only handles a few requests as shown. Setting IP to 0.0.0.0 will listen on all IP addresses.

server.dart
1
2
3
4
5
6
7
8
  server = new HttpServer();
  WebSocketHandler wsHandler = new WebSocketHandler();
  server.addRequestHandler((req) => req.path == '/ws', wsHandler.onRequest);
  server.defaultRequestHandler = _loadIndex;
  server.addRequestHandler((req) => req.path == '/main.html', _loadFile);
  server.addRequestHandler((req) => req.path == '/main.html_bootstrap.dart.js', _loadFile);
  server.addRequestHandler((req) => req.path == '/base.css', _loadFile);
  server.addRequestHandler((req) => req.path == '/dart.js', _loadFile);

Looking at the server.dart source code will give you a fuller example, all that is needed now is to run dart server.dart and you’ll have server running.

This is a more complicated process then it has to be, at some point it will get easier when a true deployment and configuration story happen.

Happy Dart Hacking!!!

Dart Generating and Executing Snapshots

| Comments

Todays random walk of dartness has lead me to generating and executing snapshots.

What is a snapshot in terms of Dart? Serialized binary heaps. It has been said that snapshots can help apps startup 10X faster. dart2js is a working example of this in action, when you execute the dart2js compiler it is actually running from a snapshot file.

How can I currently generate them? (Might not be this way in the future) As of now you need to build from source so the gen_snapshot binary is built. gen_snapshot is the tool built from gen_snapshot.cc.

1
2
3
4
5
6
7
8
9
10
11
12
13
14
15
16
17
~/dart_bleeding/dart/xcodebuild/DebugIA32/test
$ cd dart

~/dart_bleeding/dart/xcodebuild/DebugIA32/test
$ git svn fetch

~/dart_bleeding/dart/xcodebuild/DebugIA32/test
$ git merge git-svn

~/dart_bleeding/dart/xcodebuild/DebugIA32/test
$ gclient sync

~/dart_bleeding/dart/xcodebuild/DebugIA32/test
$ gclient runhooks

~/dart_bleeding/dart/xcodebuild/DebugIA32/test
$ ./tools/build.py -m all --verbose -a ia32 --os=host -j 4

After that song and dance is finished the release build directory should contain the gen_snapshot executable.

1
2
3
4
5
6
7
8
9
10
11
12
13
14
~/dart_bleeding
$ cd dart/xcodebuild/ReleaseIA32/

~/dart_bleeding/dart/xcodebuild/ReleaseIA32
$ ls
analyzer                  libcrnspr.a               libdart_vm.a              libv8_base.a
api_docs                  libcrnss.a                libdart_withcore.a        libv8_nosnapshot.a
d8                        libcrnssckbi.a            libdouble_conversion.a    libv8_snapshot.a
dart                      libdart.a                 libjscre.a                mksnapshot
dart-sdk                  libdart_builtin.a         libnss_static_dart.a      packages
dart2js.snapshot          libdart_dependency_helper libsample_extension.dylib process_test
dart_no_snapshot          libdart_io.a              libsqlite3.a              run_vm_tests
gen_snapshot              libdart_lib.a             libssl_dart.a
libchrome_zlib.a          libdart_lib_withcore.a    libtest_extension.dylib

Running gen_snapshot --help we find the flags needed to generate a snapshot script.

1
2
3
4
5
6
7
8
9
10
11
12
13
14
15
16
17
18
19
20
21
22
23
24
25
26
~/dart_bleeding/dart/xcodebuild/ReleaseIA32
$ ./gen_snapshot --help
No snapshot output file specified.

Usage:

  gen_snapshot [<vm-flags>] [<options>] \
               {--script_snapshot=<out-file> | --snapshot=<out-file>} \
               [<dart-script-file>]

  Writes a snapshot of <dart-script-file> to <out-file>. If no
  <dart-script-file> is passed, a generic snapshot of all the corelibs is
  created. One of the following is required:

    --script_snapshot=<file>   Generates a script snapshot.
    --snapshot=<file>          Generates a complete snapshot. Uses the url
                               mapping specified on the command line to load
                               the libraries.
Supported options:

--package_root=<path>
  Where to find packages, that is, "package:..." imports.

--url_mapping=<mapping>
  Uses the URL mapping(s) specified on the command line to load the
  libraries. For use only with --snapshot=.

The dart vm provides a flag that allows the vm to load the dart script from a snapshot.

1
2
--use_script_snapshot=<file_name>
  executes Dart script present in the specified snapshot file

Combining all this together and using the benchmark_harness we can test out creating and running a dart application from a snapshot.

1
2
3
4
5
6
7
8
9
10
11
12
13
14
15
16
17
18
19
20
21
22
23
24
25
26
27
28
29
30
31
32
33
34
35
36
37
38
39
40
41
42
git clone https://github.com/financeCoding/benchmark_harness.git

~/dart
$ cd benchmark_harness/

~/dart/benchmark_harness
$ pub install
Resolving dependencies...
Dependencies installed!

~/dart/benchmark_harness
$ cd example/

~/dart/benchmark_harness/example
$ ls
DeltaBlue.dart     Richards.dart      Template.dart      packages

~/dart/benchmark_harness/example
$ ~/dart_bleeding/dart/xcodebuild/DebugIA32/dart DeltaBlue.dart
DeltaBlue(RunTime): 4326.133909287257 us.

~/dart/benchmark_harness/example
$ ~/dart_bleeding/dart/xcodebuild/DebugIA32/dart Richards.dart
Richards(RunTime): 2135.538954108858 us.

~/dart/benchmark_harness/example
$ ~/dart_bleeding/dart/xcodebuild/DebugIA32/gen_snapshot --script_snapshot=DeltaBlue.snapshot DeltaBlue.dart

~/dart/benchmark_harness/example
$ ~/dart_bleeding/dart/xcodebuild/DebugIA32/dart --use_script_snapshot=./DeltaBlue.snapshot DeltaBlue.dart
DeltaBlue(RunTime): 4268.6567164179105 us.

~/dart/benchmark_harness/example
$ ~/dart_bleeding/dart/xcodebuild/DebugIA32/gen_snapshot --script_snapshot=Richards.snapshot Richards.dart

~/dart/benchmark_harness/example
$ ~/dart_bleeding/dart/xcodebuild/DebugIA32/dart --use_script_snapshot=./Richards.snapshot Richards.dart
Richards(RunTime): 2082.206035379813 us.

~/dart/benchmark_harness/example
$ ~/dart_bleeding/dart/xcodebuild/DebugIA32/dart --use_script_snapshot=./Richards.snapshot Richards.dart
Richards(RunTime): 2079.002079002079 us.

The above examples might not be the best, but it’s a start to using snapshots and loading them from dart vm.

After reading John McCutchan comment below I’ve generated much more interesting output.

1
2
3
4
5
6
7
8
9
10
11
12
13
14
15
16
17
18
19
20
21
22
23
24
25
26
27
28
29
30
31
32
33
34
35
36
37
38
39
40
41
42
43
44
45
46
47
48
49
50
51
52
53
54
55
56
57
58
59
23:49:47-adam@Adams-MacBook-Air:~/dart/benchmark_harness/example
$ ~/dart_bleeding/dart/xcodebuild/DebugIA32/dart  --compiler_stats  --use_script_snapshot=./Richards.snapshot Richards.dart
Richards(RunTime): 2069.2864529472595 us.
==== Compiler Stats ====
Number of tokens:   0
  Literal tokens:   0
  Ident tokens:     0
Tokens consumed:    6973 (inf times number of tokens)
Tokens checked:     49617  (7.12 times tokens consumed)
Token rewind:       3643 (7% of tokens checked)
Token lookahead:    2361 (4% of tokens checked)
Source length:      0 characters
Scanner time:       0 msecs
Parser time:        18 msecs
Code gen. time:     66 msecs
  Graph builder:    7 msecs
  Graph SSA:        0 msecs
  Graph inliner:    10 msecs
    Parsing:        2 msecs
    Building:       1 msecs
    SSA:            1 msecs
    Optimization:   2 msecs
    Substitution:   0 msecs
  Graph optimizer:  13 msecs
  Graph compiler:   29 msecs
  Code finalizer:   4 msecs
Compilation speed:  0 tokens per msec
Code size:          56 KB
Code density:       0 tokens per KB
23:50:06-adam@Adams-MacBook-Air:~/dart/benchmark_harness/example
$ ~/dart_bleeding/dart/xcodebuild/DebugIA32/dart  --compiler_stats Richards.dart
Richards(RunTime): 2073.5751295336786 us.
==== Compiler Stats ====
Number of tokens:   1981
  Literal tokens:   68
  Ident tokens:     692
Tokens consumed:    13539 (6.83 times number of tokens)
Tokens checked:     87271  (6.45 times tokens consumed)
Token rewind:       5849 (6% of tokens checked)
Token lookahead:    3954 (4% of tokens checked)
Source length:      15543 characters
Scanner time:       3 msecs
Parser time:        23 msecs
Code gen. time:     110 msecs
  Graph builder:    5 msecs
  Graph SSA:        0 msecs
  Graph inliner:    13 msecs
    Parsing:        2 msecs
    Building:       2 msecs
    SSA:            1 msecs
    Optimization:   3 msecs
    Substitution:   1 msecs
  Graph optimizer:  13 msecs
  Graph compiler:   69 msecs
  Code finalizer:   6 msecs
Compilation speed:  14 tokens per msec
Code size:          89 KB
Code density:       22 tokens per KB
23:50:26-adam@Adams-MacBook-Air:~/dart/benchmark_harness/example

References made about snapshots in no particular order

Listing Files With Google Drive and Dart

| Comments

Moving forward with my curiosity of Google drive and Dart, today was spent creating a small sample that lists files. For the most part this is a continuation of the following post getting-started-with-dart-and-google-drive.

Decided to move the loading of client.js into its own helper class for now. When dart has real support for Google client apis none of this will be needed. As of now this serves as good practice and examples of javascript/dart interop.

dart_drive_files_list.dart
1
2
3
4
5
6
7
8
9
10
11
12
13
14
15
16
17
18
19
20
21
22
23
24
25
26
27
28
29
30
31
32
33
34
35
36
37
38
39
40
41
42
43
44
45
46
47
48
49
50
51
52
53
54
55
56
57
58
59
60
61
62
63
64
65
/**
 * Sample google api client loader.
 */
class GoogleApiClientLoader {
  static const String _CLIENT_ID = '299615367852.apps.googleusercontent.com';
  static const String _SCOPE = 'https://www.googleapis.com/auth/drive';
  static const String _handleClientLoadName = "handleClientLoad";

  static void _loadScript() {
    /**
     * Create and load script element.
     */
    ScriptElement script = new ScriptElement();
    script.src = "http://apis.google.com/js/client.js?onload=$_handleClientLoadName";
    script.type = "text/javascript";
    document.body.children.add(script);
  }

  static void _createScopedCallbacks(var completer) {
    js.scoped((){
      /**
       * handleAuthResult is called from javascript when
       * the function to call once the login process is complete.
       */
      js.context.handleAuthResult = new js.Callback.many((js.Proxy authResult) {
        Map dartAuthResult = JSON.parse(js.context.JSON.stringify(authResult));
        completer.complete(dartAuthResult);
      });

      /**
       * This javascript method is called when the client.js script
       * is loaded.
       */
      js.context.handleClientLoad =  new js.Callback.many(() {
        js.context.window.setTimeout(js.context.checkAuth, 1);
      });

      /**
       * Authorization check if the client allows this
       * application to access its google drive.
       */
      js.context.checkAuth = new js.Callback.many(() {
        js.context.gapi.auth.authorize(
            js.map({
              'client_id': _CLIENT_ID,
              'scope': _SCOPE,
              'immediate': true
            }),
            js.context.handleAuthResult);
      });

    });
  }

  /**
   * Load the google client api, future returns
   * map results.
   */
  static Future<Map> load() {
    var completer = new Completer();
    _createScopedCallbacks(completer);
    _loadScript();
    return completer.future;
  }
}

The calling of load() returns a future with our authentication results. Eases the process of having the google drive scope available to the client application.

A simple dart Drive class created gives access to the list call from the javascript apis. The interesting point for me to learn is knowing that client.js has to load the drive api. In the load() future we call js.context.gapi.client.load which will take the api and version to be loaded for the client application.

dart_drive_files_list.dart
1
2
3
4
5
6
7
8
9
10
11
12
13
14
15
16
17
18
19
20
21
22
23
24
25
26
27
28
29
30
31
32
33
34
35
36
37
38
39
40
41
42
43
44
45
46
47
48
49
50
51
52
53
54
55
56
57
/**
 * Sample google drive class.
 */
class Drive {
  js.Proxy _drive;
  bool get _isLoaded => _drive != null;

  /**
   * Load the gapi.client.drive api.
   */
  Future<bool> load() {
    var completer = new Completer();
    js.scoped(() {
      js.context.gapi.client.load('drive', 'v2', new js.Callback.once(() {
        _drive = js.context.gapi.client.drive;
        js.retain(_drive);
        completer.complete(true);
      }));
    });
    return completer.future;
  }

  /**
   * Check if gapi.client.drive is loaded, if not
   * load before executing.
   */
  void _loadederExecute(Function function) {
    if (_isLoaded) {
      function();
    } else {
      load().then((s) {
        if (s == true) {
          function();
        } else {
          throw "loadedExecute failed";
        }
      });
    }
  }

  /**
   * List files with gapi.drive.files.list()
   */
  Future<Map> list() {
    var completer = new Completer();
    _loadederExecute(() {
      js.scoped(() {
        var request = _drive.files.list();
        request.execute(new js.Callback.once((js.Proxy jsonResp, var rawResp) {
          Map m = JSON.parse(js.context.JSON.stringify(jsonResp));
          completer.complete(m);
        }));
      });
    });
    return completer.future;
  }
}

With the following sugar classes it was easy to just list files from my google drive account.

dart_drive_files_list.dart
1
2
3
4
5
6
7
8
9
10
11
12
13
14
15
16
17
18
void main() {
  Drive drive = new Drive();
  GoogleApiClientLoader.load().then((result) {
    drive.list().then((Map files) {
      // https://developers.google.com/drive/v2/reference/files/list
      files['items'].forEach((i) {
        var li = new LIElement();
        AnchorElement a = new AnchorElement();
        a.href = i['alternateLink'];
        a.target = '_blank';
        a.text = i['title'];
        li.children.add(a);
        UListElement ul = query('#listmenu');
        ul.children.add(li);
      });
    });
  });
}

listing-files-drive

Hopefully this helps with developers interested in google drive & dart! Sample can be found on github dart_drive_files_list

Getting Started With Dart and Google Drive

| Comments

Following the example code from google drive quickstart I was able to recreate the sample in Dart. A lot of the heavy lifting is done by the js-interop cause of the dependency on google javascript client api. This solution is fine for now, I’d take a good guess the dart team will provide client apis at some point.

Started off by creating a new sample project dart_drive_quickstart, removed all default code and add js-interop.

create-new-app

remove-defaults

Bring in the javascript client apis as ScriptElement and set a onload handler to a dart callback.

dart_drive_quickstart.dart
1
2
3
4
5
6
7
8
9
10
11
12
13
14
15
16
17
18
19
20
21
22
23
24
25
26
27
28
29
30
31
32
33
34
import 'dart:html';
import 'dart:json';
import 'package:js/js.dart' as js;

final String CLIENT_ID = '<YOURCLIENTID>';
final String SCOPE = 'https://www.googleapis.com/auth/drive';

void main() {
  js.scoped((){
    js.context.handleAuthResult = new js.Callback.many((js.Proxy authResult) {
      Map dartAuthResult = JSON.parse(js.context.JSON.stringify(authResult));
      print("dartAuthResult = ${dartAuthResult}");
    });

    js.context.handleClientLoad =  new js.Callback.many(() {
      js.context.window.setTimeout(js.context.checkAuth, 1);
    });

    js.context.checkAuth = new js.Callback.many(() {
      js.context.gapi.auth.authorize(
          js.map({
              'client_id': CLIENT_ID,
              'scope': SCOPE,
              'immediate': true
            }),
            js.context.handleAuthResult);
    });        
  });

  ScriptElement script = new ScriptElement();
  script.src = "http://apis.google.com/js/client.js?onload=handleClientLoad";
  script.type = "text/javascript";
  document.body.children.add(script);
}

Manually adding the script code and hooking up a callback from javascript to dart seemed to work fine. I ran into issues with callbacks not being scoped when they should of been scoped. Another odd thing was the need for the call to setTimeout, the callback to handleAuthResult would not get fired if checkAuth was not called from setTimeout.

The rest of the code included was for the most part a direct translation of the quickstart sample. Added some dart flavoring when appropriate.

Here are some action shots and code. The full project can be found on github dart_drive_quickstart

app-launched

file-choose

file-uploaded

file-opened-in-drive

dart_drive_quickstart.dart
1
2
3
4
5
6
7
8
9
10
11
12
13
14
15
16
17
18
19
20
21
22
23
24
25
26
27
28
29
30
31
32
33
34
35
36
37
38
39
40
41
42
43
44
45
46
47
48
49
50
51
52
53
54
55
56
57
58
59
60
61
62
63
64
65
66
67
68
69
70
71
72
73
74
75
76
77
78
79
80
81
82
83
84
85
86
87
88
89
90
91
92
93
94
95
96
97
98
99
100
101
102
103
104
105
106
107
108
109
110
111
112
113
114
115
116
117
118
119
120
121
122
123
124
125
126
127
128
129
130
131
132
133
134
135
136
137
138
139
140
import 'dart:html';
import 'dart:json';
import 'package:js/js.dart' as js;

final String CLIENT_ID = '299615367852.apps.googleusercontent.com';
final String SCOPE = 'https://www.googleapis.com/auth/drive';

void main() {
  js.scoped((){
    void insertFile(File fileData, [callback = null]) {
      String boundary = '-------314159265358979323846';
      String delimiter = "\r\n--$boundary\r\n";
      String close_delim = "\r\n--$boundary--";

      var reader = new FileReader();
      reader.readAsBinaryString(fileData);
      reader.on.load.add((Event e) {
        var contentType = fileData.type;
        if (contentType.isEmpty) {
          contentType = 'application/octet-stream';
        }

        var metadata = {
          'title' : fileData.name,
          'mimeType' : contentType
        };

        var base64Data = window.btoa(reader.result);
        var sb = new StringBuffer();
        sb
        ..add(delimiter)
        ..add('Content-Type: application/json\r\n\r\n')
        ..add(JSON.stringify(metadata))
        ..add(delimiter)
        ..add('Content-Type: ')
        ..add(contentType)
        ..add('\r\n')
        ..add('Content-Transfer-Encoding: base64\r\n')
        ..add('\r\n')
        ..add(base64Data)
        ..add(close_delim);

        var multipartRequestBody = sb.toString();

        print("multipartRequestBody");
        print(multipartRequestBody);

        js.scoped(() {
          var request = js.context.gapi.client.request(
            js.map({
              'path': '/upload/drive/v2/files',
              'method': 'POST',
              'params': {'uploadType': 'multipart'},
              'headers': {
                'Content-Type': 'multipart/mixed; boundary="$boundary"'
              },
              'body': multipartRequestBody
            }));

          if (callback == null) {
            callback = new js.Callback.many((js.Proxy jsonResp, var rawResp) {
              print(js.context.JSON.stringify(jsonResp));
              print(rawResp);

              Map r = JSON.parse(js.context.JSON.stringify(jsonResp));
              StringBuffer sb = new StringBuffer();
              if (r.containsKey('error')) {
                sb.add(r.toString());
              } else {
                sb.add("${r["title"]} has been uploaded.");
              }

              query('#text').text = sb.toString();
            });
          }

          request.execute(callback);
        });

      });
    };

    void uploadFile(Event evt) {
      js.scoped( () {
        js.context.gapi.client.load('drive', 'v2', new js.Callback.many(() {
          var file = evt.target.files[0];
          insertFile(file);
        }));
      });
    }

    js.context.handleAuthResult = new js.Callback.many((js.Proxy authResult) {
      Map dartAuthResult = JSON.parse(js.context.JSON.stringify(authResult));
      print("dartAuthResult = ${dartAuthResult}");

      var authButton = query('#authorizeButton');
      var filePicker = query('#filePicker');
      authButton.style.display = 'none';
      filePicker.style.display = 'none';

      if (!dartAuthResult.containsKey('error')) {
        // Access token has been successfully retrieved, requests can be sent to the API.
        filePicker.style.display = 'block';
        filePicker.on['change'].add(uploadFile);
      } else {
        authButton.style.display = 'block';
        authButton.on.click.add((Event e) {
          js.scoped(() {
            js.context.gapi.auth.authorize(
                js.map({
                    'client_id': CLIENT_ID,
                    'scope': SCOPE,
                    'immediate': true
                  }),
                  js.context.handleAuthResult);
          });
        });
      }
    });

    js.context.handleClientLoad =  new js.Callback.many(() {
      js.context.window.setTimeout(js.context.checkAuth, 1);
    });

    js.context.checkAuth = new js.Callback.many(() {
      js.context.gapi.auth.authorize(
          js.map({
              'client_id': CLIENT_ID,
              'scope': SCOPE,
              'immediate': true
            }),
            js.context.handleAuthResult);
    });
  });

  ScriptElement script = new ScriptElement();
  script.src = "http://apis.google.com/js/client.js?onload=handleClientLoad";
  script.type = "text/javascript";
  document.body.children.add(script);
}

Builtool and Libraries With Cordova in Dart on Ios

| Comments

Continuing on the chain of phonegap_from_scratch, this post goes over buildtool and libraries.

Took an afternoon to look into using buildtool for helping call dart2js on save within the DartEditor. Minor modifications was needed to redirect the generated javascript code to the cordova www directory in the project. This tool is still in the works and future versions will be more robust.

The trend with dart currently is to use pub with github or to publish on pub.dartlang.org. A great feature with pub is if you want to make modifications to an existing project on github, fork+branch is an easy way to get hacking with modifications to an existing package. buildtool’s quick hack was added to the pubspec.yaml file as follows.

pubspec.yaml
1
2
3
4
5
6
7
8
9
10
name:  dartdova
description:  A sample dart cordova integration
dependencies:
  js: any
  unittest: 0.2.9+7
  logging: 0.2.9+7
  buildtool:
    git:
      url: git://github.com/financeCoding/buildtool.git
      ref: diroverride

This pubspec.yaml pulls in the branch diroverride from a cloned version of buildtool from my github. Awesome solution for modifications that might not be upstreamed and needed quickly for testing.

Moving along, the DartEditor will look for a build.dart file in the root directory of a projects folder. When that file is found it will execute on file changes within the project. buildtool currently provides a client/server architecture for building or transforming dart projects. The particular task I was interested in is Dart2JSTask which calls the dart2js compiler on modified dart files. With my modifications it now outputs the generated javascript code into the directory specified in the Dart2JSTask.withOutDir constructor.

build.dart
1
2
3
4
5
6
7
8
9
10
11
12
13
#!/usr/bin/env dart

import 'dart:io';
import 'package:buildtool/buildtool.dart';
import 'package:buildtool/dart2js_task.dart';
void main() {
  var config = () {
    var dart2jstask = new Dart2JSTask.withOutDir("dart2js", new Path("."));
    addTask(["app.dart"], dart2jstask);
  };

  configure(config);
}

The way that I’ve approached running the server side of the buildtool was to launch a ./build.dart --server process before opening the project in the DartEditor.

output
1
2
3
4
5
6
7
~/dart/phonegap_from_scratch/phonegap_from_scratch/www
$ ./build.dart --server
2012-12-29 23:06:49.732 INFO adding task Instance of 'Dart2JSTask' for files [app.dart]
2012-12-29 23:06:49.757 INFO startServer
2012-12-29 23:06:49.757 INFO listening on localhost:52746
buildtool server ready
port: 52746

On each save in the project the server side will generate javascript code via Dart2JSTask.

output
1
2
3
4
5
6
7
8
9
10
11
12
13
2012-12-29 23:07:51.897 INFO starting build
2012-12-29 23:07:51.903 INFO cwd: /Users/adam/dart/phonegap_from_scratch/phonegap_from_scratch/www build_out/out
2012-12-29 23:07:51.909 FINE _runTasks: [_source:app.dart]
2012-12-29 23:07:51.911 INFO cwd: /Users/adam/dart/phonegap_from_scratch/phonegap_from_scratch/www build_out/_dart2js
2012-12-29 23:07:51.915 INFO dart2js task starting. files: [_source:app.dart]
2012-12-29 23:07:51.918 FINE running dart2js args: [--out=./app.dart.js, --verbose, app.dart]
2012-12-29 23:08:00.778 FINE dart2js exitCode: 0
2012-12-29 23:08:00.779 INFO dartjs tasks complete
2012-12-29 23:08:00.784 FINE tasks at depth 0 complete
2012-12-29 23:08:01.288 INFO starting build
2012-12-29 23:08:01.289 INFO cwd: /Users/adam/dart/phonegap_from_scratch/phonegap_from_scratch/www build_out/out
2012-12-29 23:08:01.291 FINE _runTasks: [_source:app.dart.js, _source:app.dart.js.deps, _source:app.dart.js.map]
2012-12-29 23:08:01.291 FINE tasks at depth 0 complete

This solution saves me having to run the ./build.sh from command line and launching the iOS simulator on each launch.

The other changes to this project was to refactor the single app.dart into a collection of dart library files. Seems that each of the API categories have been implemented as singletons. At some point I may make this similar to gap where each category of API is a singleton and instantiated at the top level of a dart library.

output
1
2
3
4
5
6
7
8
9
10
11
12
13
14
15
16
17
18
19
20
21
22
~/dart/phonegap_from_scratch/phonegap_from_scratch/www
$ tree
.
├── app.dart
├── app.dart.js
├── app.dart.js.deps
├── app.dart.js.map
├── build.dart
├── build.sh
├── cordova.js
├── dart.js
├── dart_interop.js
├── index.html
├── lib
│   └── src
│       ├── connection.dart
│       ├── cordova_events.dart
│       ├── device.dart
│       ├── globalization.dart
│       ├── notification.dart
│       └── splashscreen.dart
└── pubspec.yaml

New classes added Connection, CordovaEvents, Notification, Splashscreen and Globalization. Globalization is presenting a problem with knowing the proper ways to parse date strings within the javascript implementation dependent scenarios. For now I might just skip them, different javascript engines parse Date strings different ways and my goal was not to cover all of them. app.dart is now importing the libraries directly at some point a single lib/cordova.dart library should be provided.

This is where my journey for tonight has ended, Contacts might be the next exciting class of API to cover.

The code for phonegap_from_scratch can be found on github

Event Handling and Logging With Cordova in Dart on iOS

| Comments

Continuing on the chain of phonegap_from_scratch this post goes over event handlers and logging.

Adding logging was trivial with the logger library on pub. Adding the following dependencies and setup configuration code was just enough to help with logging tests and code.

pubspec.yaml
1
2
3
4
5
6
name:  dartdova
description:  A sample dart cordova integration
dependencies:
  js: any
  unittest: 0.2.9+7
  logging: 0.2.9+7
configureLogging
1
2
3
4
5
6
7
void configureLogging() {
  Logger.root.level = Level.ALL;
  Logger.root.on.record.add((LogRecord r) {
    // Print to console.log when compiled to javascript.
    print("${r.loggerName}:${r.level.name}:${r.sequenceNumber}:\n${r.message.toString()}");
  });
}

Cordova ships with a list of custom events that can be fired off to the dom. The common pattern is to add event handlers to these events. Luckily we can receive the events without having to register handles with js-interop.

deviceready
pause
resume
online
offline
backbutton
batterycritical
batterylow
batterystatus
menubutton
searchbutton
startcallbutton
endcallbutton
volumedownbutton
volumeupbutton

I’ve noticed a few of them need to be hooked really early in the loading of a dart application. One deviceready being critical for knowing when the device is ready. If they are not hooked early in the application you could miss the event. At least I’ve noticed that with the iOS simulator.

main
1
2
3
4
5
6
7
8
9
void main() {
  /**
   * Cordova.js will fire off 'deviceready' event once fully loaded.
   * listen for the event on js.context.document.
   *
   * This must be the first event wired up before creating Device.
   */
  document.on['deviceready'].add(deviceReady);
}

online, offline, battery* are also events that one might want to catch early in main(). Later in the application after deviceready has been fired off you can remove the old handlers and add new ones that relate to the context created.

The design pattern for Device is a singleton which left me with having event handlers registered whenever any newed references go out of scope. This works for now, another approach for event handling could of been to use Reactive-Dart Observable object.

Device
1
2
3
4
5
6
7
8
9
10
11
12
13
14
15
16
17
18
19
20
21
22
23
24
25
26
27
28
29
30
31
32
33
34
35
36
37
38
39
40
41
42
43
44
45
/** The device: Singleton */
class Device {
  static final Device _singleton = new Device._internal();

  Logger _logger;
  js.Proxy _device;

  factory Device() {
    return _singleton;
  }

  Device._internal() {
    _logger = new Logger("Device");

    _registerHandlers();

    js.scoped(() {
      _device = js.context.device;
      js.retain(_device);
    });

  }

  void _registerHandlers() {
    _onOnlineHandlers = new List<Function>();
    document.on['online'].add(_onOnline);

    _onOfflineHandlers = new List<Function>();
    document.on['offline'].add(_onOffline);
  }

  String get name => js.scoped(() => _device.name);
  String get cordova => js.scoped(() => _device.cordova);
  String get platform => js.scoped(() => _device.platform);
  String get uuid => js.scoped(() => _device.uuid);
  String get version => js.scoped(() => _device.version);

  List<Function> _onOnlineHandlers;
  List<Function> get onOnline => _onOnlineHandlers;
  void _onOnline(Event event) => _onOnlineHandlers.forEach((handler)=>handler(event));

  List<Function> _onOfflineHandlers;
  List<Function> get onOffline => _onOfflineHandlers;
  void _onOffline(Event event) => _onOfflineHandlers.forEach((handler)=>handler(event));
}

Creating tests for this type of pluming was not too difficult using expectAsync1. The most of time spent on figuring this out was creating CustomEvent and calling dispatch. This is enough functionality to see that device was properly wired up with handlers. I found it important to cover lots of tests when working with Cordova, error handling and reporting is very minimal. At times something would stop working with no console output. So I move forward with code and test in tandem.

runTests
1
2
3
4
5
6
7
8
9
10
11
12
13
14
15
16
17
test('Device Event online', () {
  var eventName = 'online';
  var asyncMethod = expectAsync1((Event event)=>expect(event.type, equals('$eventName')));
  var customEvent = new CustomEvent('$eventName', true, false, "custom event");
  var device = new Device();
  device.onOnline.add(asyncMethod);
  document.on['$eventName'].dispatch(customEvent);
});

test('Device Event offline', () {
  var eventName = 'offline';
  var asyncMethod = expectAsync1((Event event)=>expect(event.type, equals('$eventName')));
  var customEvent = new CustomEvent('$eventName', true, false, "custom event");
  var device = new Device();
  device.onOffline.add(asyncMethod);
  document.on['$eventName'].dispatch(customEvent);
});

unittest_pass

So far this is a good enough to have a device class and event handlers for custom events. The single app.dart is starting to get large, next it should be broken out. I integrated the event handling directly in the Device class, but the Cordova API Reference keeps them at the top level of the application. So a singleton Events or CordovaEvents class might be useful to separate the implementation out.

A project that is just starting to hit the dart-lang github repository is buildtool. buildtool might provide a better solution then having a custom build script that needs to be called before each launch of the simulator.

The code for phonegap_from_scratch can be found on github

Unit Testing With Dart and Cordova on iOS

| Comments

Continuing on from following post, the next step forward for building stuff with Dart and Cordova was to get some unit testing. First class to test is Device. The tests created here are specific to the platform and simulator. Did not add any of the device events for testing until I can find a way to generate them from the simulator.

First step is to add unit testing to the pub spec file.

name:  dartdova
description:  A sample dart cordova integration
dependencies:
  js: any
  unittest: 0.2.9+7

Going with useHtmlEnhancedConfiguration() from unittest/html_enhanced_config.dart did not work. Cordova or iPhone simulator seems to swallow up any exceptions or failures in rending, so resorting to the more stripped down version useHtmlIndividualConfiguration() from package:unittest/html_individual_config.dart.

Using gap as a reference it was easy enough to create a working singleton Device class.

Now building the js code with build.sh and launching iPhone simulator in Xcode.app, the passing unit test should be displayed in the simplified version of the unittest output.

unittest_pass

The code for phonegap_from_scratch can be found on github

Getting Started With Dart and Cordova From Scratch on iOS

| Comments

Looking for some fun this weekend I decided to investigate the current status of using dart and cordova together.

Breif history of Dart and Cordova comes down to two projects, solvr/dart-gap and rikulo/gap have ventured into creating a frameworks for dart and cordova interop. rikulo has latest release, decided to give it a spin. After some tinkering I had no luck with rikulo’s gap.

I decided to go down the route of finding the most minimal amount of dart code needed for loading cordova apps. A major step forward for working with cordova was the introduction of js-interop. js-interop will provide the communications needed between cordova.js context and the dart application. This example just gets the 'deviceready' event fired off from cordova.js.

Download the phonegap build and unpack into a folder.

$ mkdir ~/dart/phonegap_from_scratch/
$ cd ~/dart/phonegap_from_scratch/
$ unzip ~/Downloads/phonegap-phonegap-2.2.0-0-g8a3aa47.zip
$ mv phonegap-phonegap-8a3aa47 phonegap

This is mostly done on MacOSX

Setup and create a phonegap project

$ ./create ~/dart/phonegap_from_scratch/phonegap_from_scratch com.phonegap.from.scratch phonegap_from_scratch

Open up Xcode and do a sanity check with the default generated project from the create script.

$ open /Applications/Xcode.app

open_project_dialog

sanity_check

Remove all the files in www, rename cordova-2.2.0.js.

$ cd ~/dart/phonegap_from_scratch/phonegap_from_scratch/www/
$ rm -rf css img index.html js spec res spec.html
$ mv cordova-2.2.0.js cordova.js

Create a dart project in the www directory. This is not a typical dart package layout but works well for building and debugging. A real project might need some type of build scripts that call dart2js and copy files over to the www directory in the cordova generated project.

Install the pub dependencies. The dart.js and dart_interop.js need to be stored locally within the cordova project.

~/dart/phonegap_from_scratch/phonegap_from_scratch/www
$ pub install
Resolving dependencies...
Dependencies installed!

$ cp packages/js/dart_interop.js .
$ wget https://dart.googlecode.com/svn/branches/bleeding_edge/dart/client/dart.js

opening_dart_editor

dart_project_layout

Having little success with the other projects it took some time to figure out a proper way to load all the js files. Some combinations would not yield the ‘deviceready’ event expected from cordova. The loading order that worked best for me was cordova.js, dart.js, dart_interop.js and then the actual application app.dart.js. Running the build script and loading up the simulator should yeild some output on the console.

This is just the start of exploring integrations between dart and cordova. At least until the existing projects have an easier solution to bootstraping with their frameworks.

most_minimal_event_deviceready

Full example can be found on github phonegap_from_scratch.